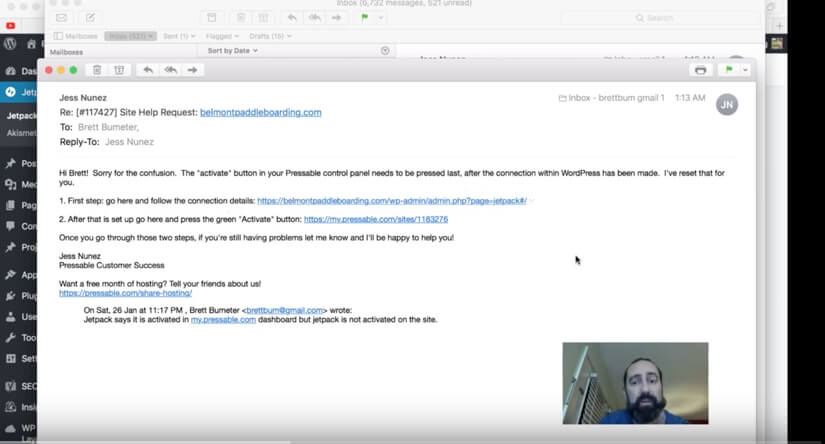
The order of activating Jetpack on a Pressable hosting plan is apparently important! I have attempted this for about 20 different websites running on Pressable, and each time I needed Pressable support to help guide me through it and even then, it took 4-5 attempts. Until this time, Jess from Pressable provided some instructions that worked for me the first time I tried them! (I still had to guess at a couple of the steps, taking what felt like an optional leap of faith) but I chose wisely or luckily or it didn’t matter and it worked!
Step 0 – DO NOT PAY FOR ANYTHING EXTRA. KEEP YOUR CREDIT CARD PUT AWAY. 🙂 Pressable plans include a free Premium level Jetpack subscription, it comes with your Pressable hosting. These steps will help you activate that plan and give you access to backups and more via Jetpack. There’s a momentary step (Step 5) where it might appear that you need to pay. DO NOT PAY. 🙂 It is just the way this activation process works between Jetpack (Automatic the company behind WordPress & Jetpack) & Pressable the hosting company.
Step 1 – in wp-admin install and activate jetpack plugin
Step 2 – Click the Green (as of jan 2019) Activate button for jetpack inside the plugin in wordpress
Step 3 – This will take you to WordPress.com‘s Jetpack activation process. You will need a WordPress account (free user id) and once you have that and are signed in, then
Step 4 – ‘Approve the connection between Jetpack the plugin and your personal WordPress.com user account
Step 5 – This will take you to a payment plan option. There appear to be 3 BUT There’s a fourth below the three. Choose the fourth option, the ‘Free’ plan (later you will get the $99 plan as part of your Pressable service, but first we connect with the Free plan and later get the Premium one upgraded by Pressable. (this is a bit confusing, just do not put a credit card anywhere and you will be good!
Step 6 – After clicking Free it takes you back into your WordPress Admin jetpack dashboard
Step 7 – Login into my.pressable.com
Step 8 – go to the domain plan that you are working on (you may have more than one website with Pressable, pick the one that relates to the steps above
Step 9 – Find the Activate Jetpack button in my.pressable.com and click it (If this is a new account, it may be a (different) green button at the top of my.pressable.com. There may be a second Activate button lower on that page. They do the same thing. You only need to click one of them. Do that – click Activate!
Step 10 – Confirm you now have a Premium Jetpack plan from Pressable – In your wordpress admin area, click on Jetpack and click on the ‘My Plans’ tab. It should now show you that your ‘plan’ is the Premium plan. (If you entered a credit card anywhere, you made a mistake!)
If Jetpack doesn’t show the new plan…
First, clear the cache on your browser and refresh your wp-admin page to check again.
If it still doesn’t show up, you may need to send in a help request or chat with Pressable support. Even though the steps above are working for me much more often than before, there may be other reasons to get help!

